Clicker 8 for Windows/Mac includes three keyboard layouts: Alphabetical, Frequency and the standard QWERTY. Each layout is available with white or rainbow-coloured keys. There are also SuperKeys variants, which cluster the keys together for better accessibility and ease of use.
However, Clicker can accommodate any type of keyboard layout you want to create and use. In this post, I will walk you through creating a new keyboard with the letters grouped in alphabetical order.
Open the Keyboards folder
Firstly, we need to find the Clicker Keyboards folder (if you get stuck, pass this onto your IT Support).
To find the Clicker Keyboards folder within Clicker 8:
- Open the Options ribbon tab up top and click the Manage tool.
- In the window that opens, open the Files tab.
- Click the path for Keyboards to open the folder in Windows/macOS. It looks like this (on Windows):
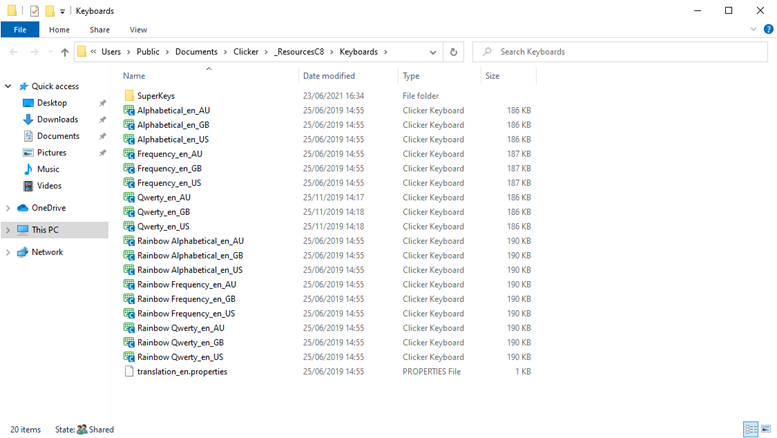
We can model our keyboard after an existing one. Double-click a keyboard to open it in Clicker 8. For this example, we’ll use the Rainbow Alphabetical_en_GB keyboard.
Copy an existing keyboard
Before making any changes, we want to create an identical copy of this keyboard. This will help in two ways: the current keyboard will remain available and customising keyboards works better in Clicker grids, as the default keyboards use pop-ups instead.
To do this:
- Click Edit up top to enter Edit View.
- Hold down Ctrl on your physical keyboard and click each grid down the left to select them all.
- With all grids selected, right-click the last one and click Copy.
- Open the Clicker Set ribbon tab up top and click New. Open the More tab, choose Custom Set and then Create (leave Blank Grids highlighted by default).
- Right-click the empty list of grids on the left and select Paste. Your list will populate with the grids from the previous Clicker Keyboard.
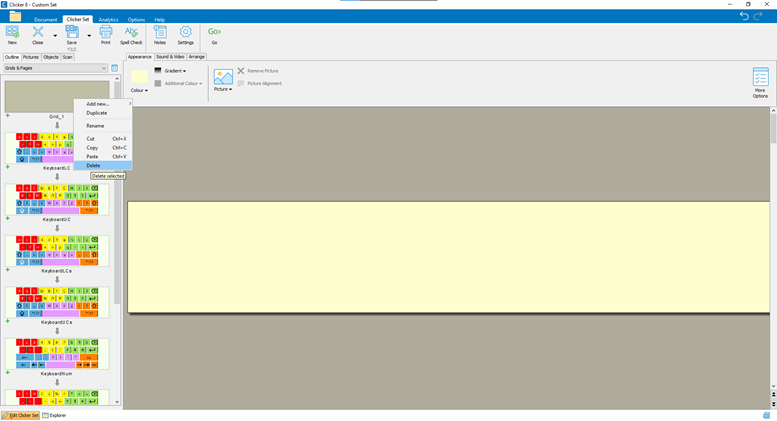
- We don’t need the first blank grid, so right-click it and select Delete.
Modify the keyboard
You can now edit the keyboard as you wish. The grids along the left represent different keyboard states, such as lowercase letters, uppercase letters, numbers, symbols, etc. For this example, we are doing a simple change. I want to group the Rainbow Alphabetic letters into clusters.
To do this, I’m going to change the red [k, l, m] keys to [d, e, f] to suit the colour coordinated alphabetical order. I’m then going to change the yellow [d, e, f, g] keys to [g, h, I, j]. The letters [n, o, p] become [k, l, m], and the green [h, I, j] become [n, o, p]. My keyboard now looks like this:
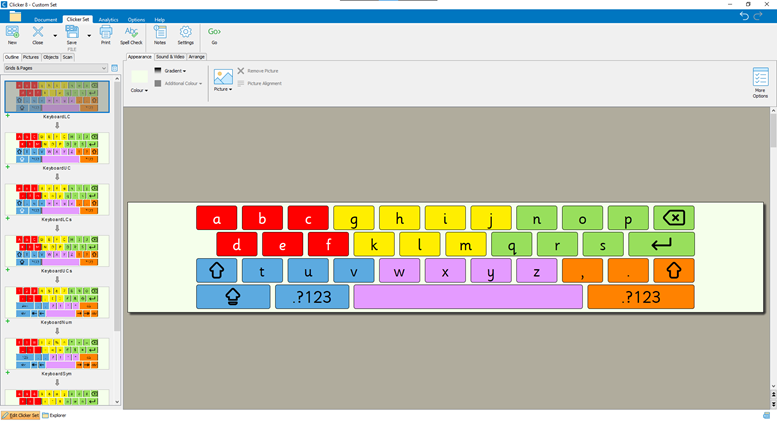
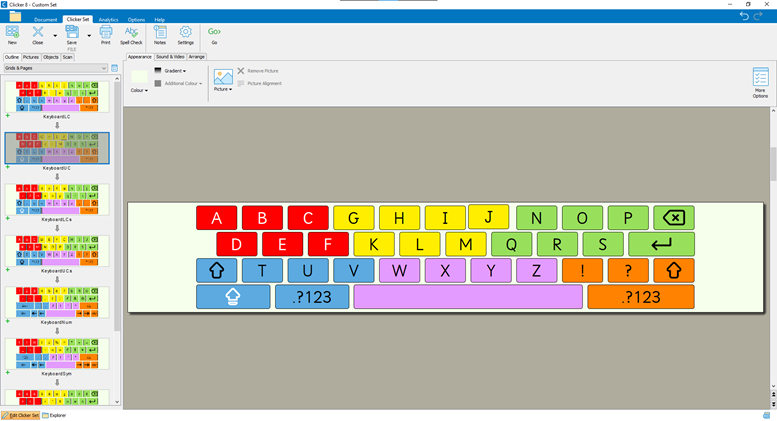
Once done, click the second grid down the left and modify it. Continue modifying the rest of the keyboard grids along the left in a way that you see fit. Here’s my second modified grid:
When finished, select the Clicker Set ribbon tab up top and then click Save As. In the window that opens, change the Save as type at the bottom to Clicker Keyboard (*.clkk). In this example, we’ll be naming our keyboard Clustered Alphabetical.
You will then be asked if you want to use the keyboard now, which you can! Alternatively, open the Options ribbon tab, click Display, open the Keyboard tab, and ensure your new keyboard is selected. Congratulations, you now have a personalised keyboard within Clicker 8!
SuperKeys
If you want to use Clicker 8’s SuperKeys accessibility feature, you will need to create a SuperKeys version of the keyboard.
In your Clicker Keyboards folder (which we navigated to at the start), you may have spotted a SuperKeys folder within. This contains SuperKeys versions of the standard keyboards.
For this example, follow the same steps as before for the Rainbow Alphabetical_en_GB file within the SuperKeys folder. To have your regular and SuperKeys versions linked, they must be named the same, which would be Clustered Alphabetical in this example.
Once you have customised the SuperKeys version to your liking, you should find that your new keyboard now works with SuperKeys enabled.
Finished!
I hope this shows you what is possible with Clicker Keyboards and that you are now able to make your own. In fact, you can create any keyboard from scratch in a Custom Set and save it as a Clicker Keyboard! It can be an exciting and helpful feature of Clicker, so feel free to share your customised keyboards with us or post them on our Facebook group to show our community your accessible keyboard variants.
Our Support team is always happy to help if you have any technical questions or difficulties getting set up with our software. You can reach us by email at support@cricksoft.com, by phone at 01604 671691, or by completing this short form.


