Saving, sharing, and printing (iPad)
With a DocsPlus subscription, you have access to the DocsPlus App – on iPads and Chromebooks.
Saving DocsPlus files
Saving DocsPlus files
-

Introduction
-

Save a Document
-

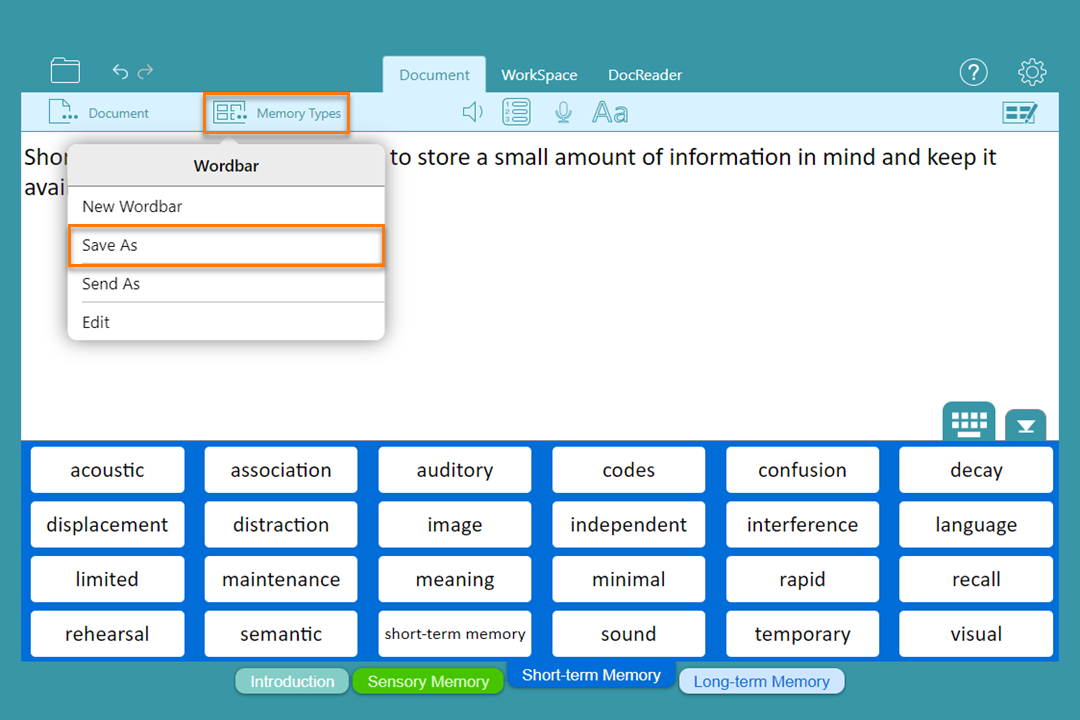
Save a Wordbar
-

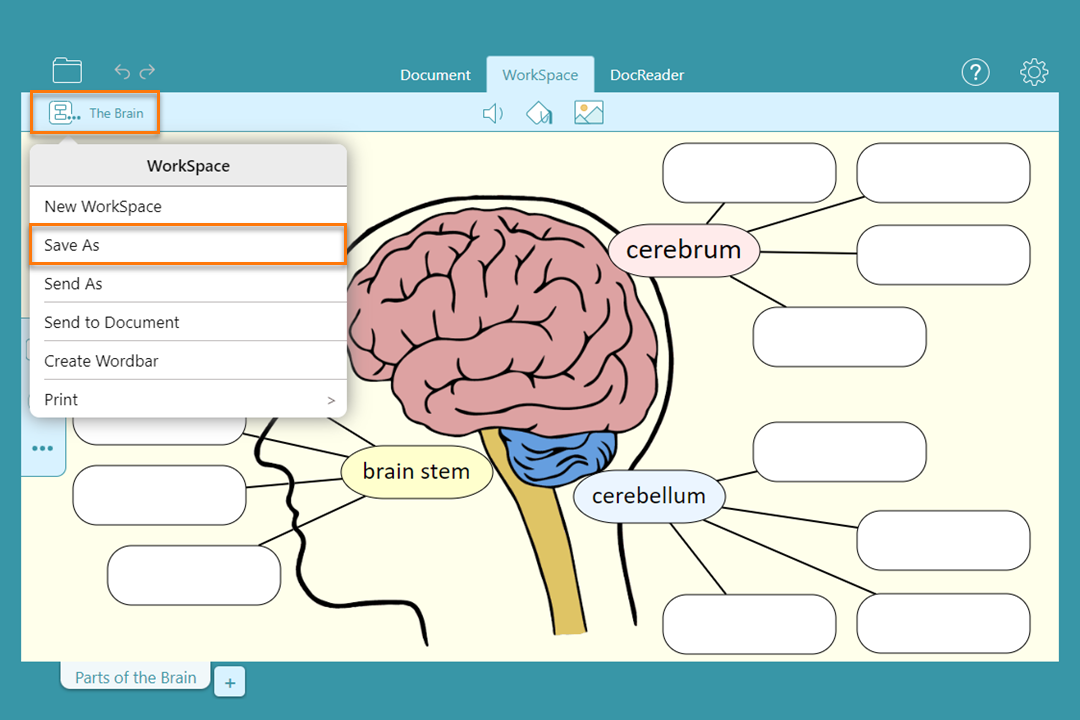
Save a WorkSpace
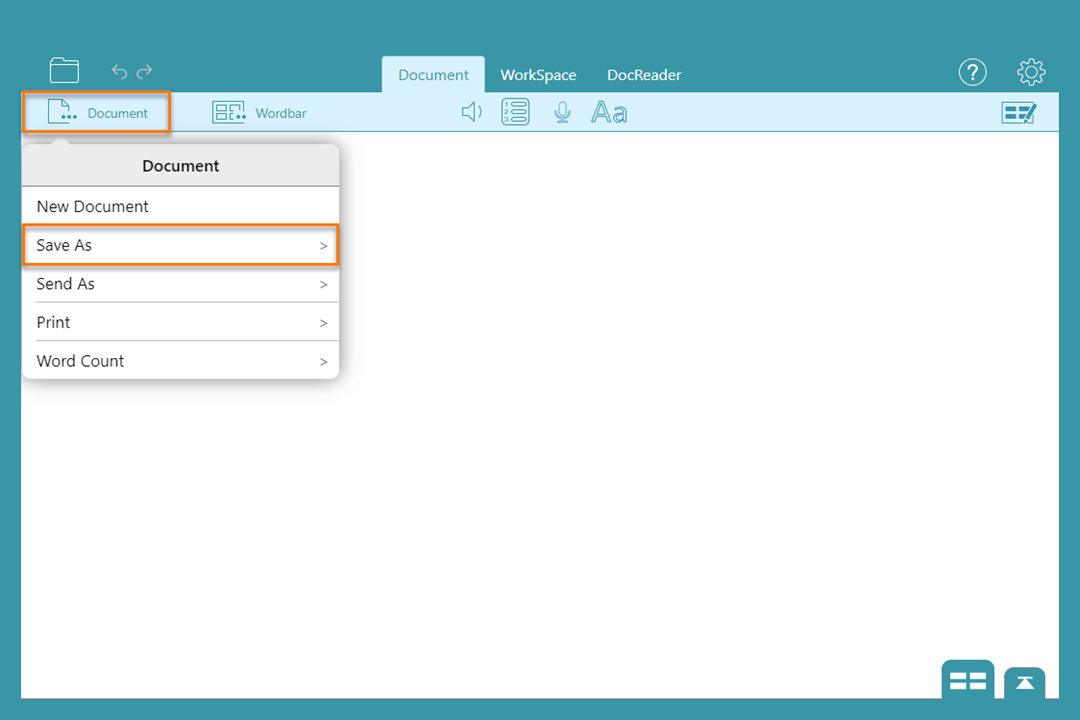
Save a Document

Sharing DocsPlus files
Share a DocsPlus file to open it on another device or make it available to other staff and learners.
Sharing DocsPlus files
-

Share via email
-

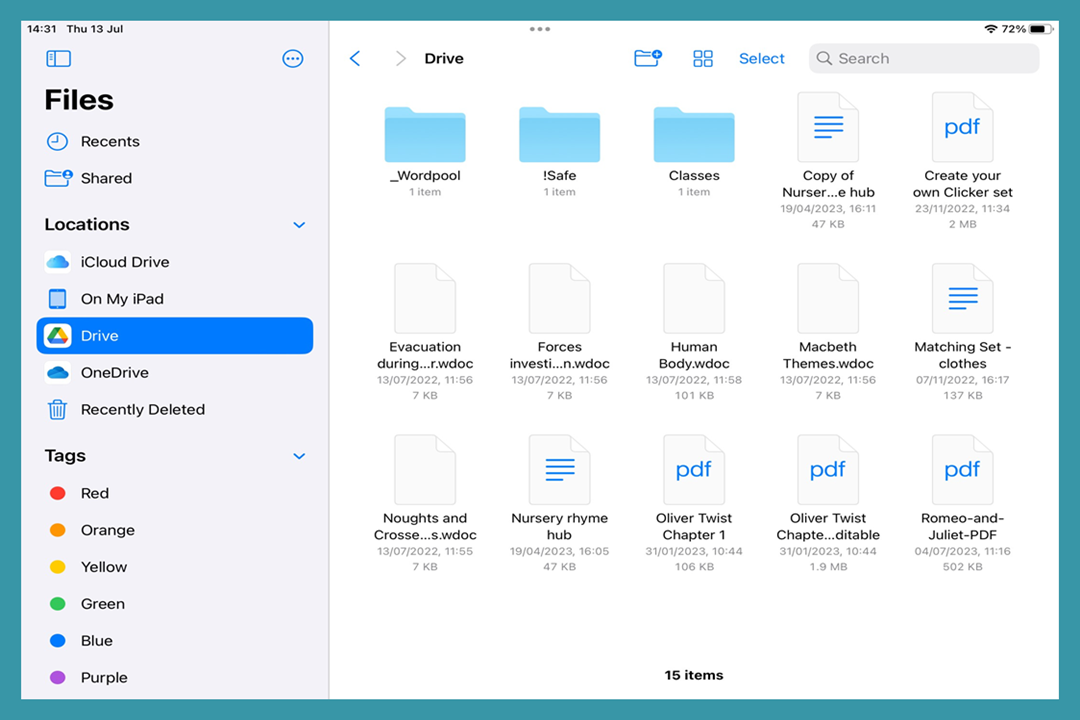
Share via cloud storage
-

Share via AirDrop

Share a Document
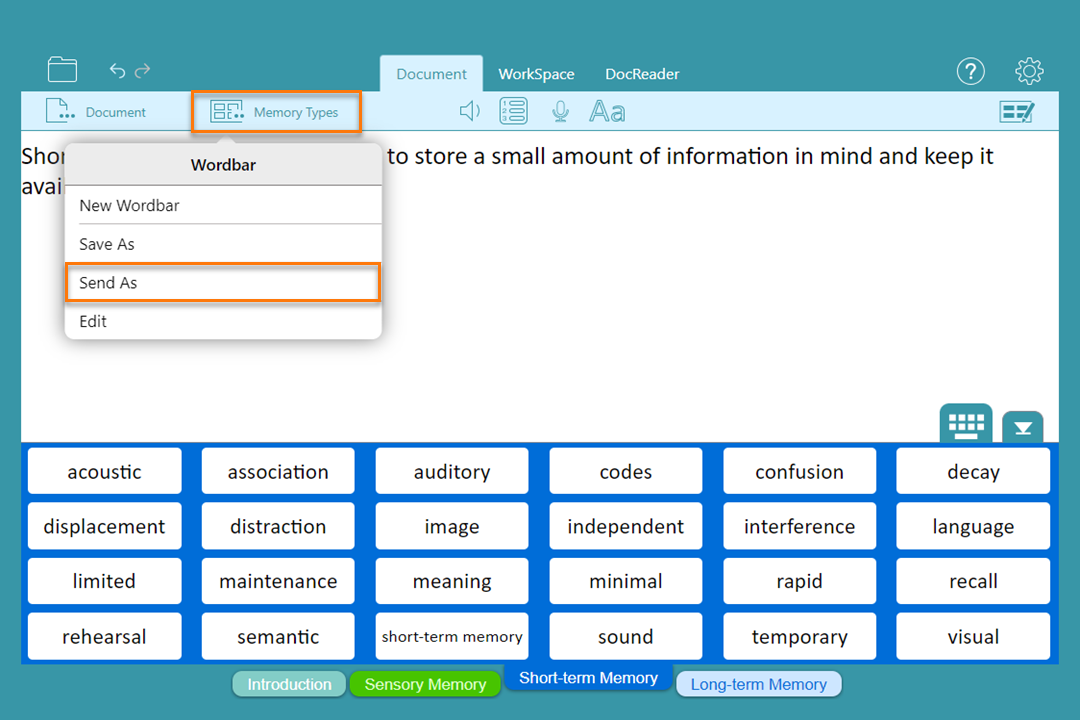
- Tap
 and choose Send As.
 - Choose in which format you want to share your Document.
- In the iPad sharing popover, choose Mail or your regular email app.
- A blank email should appear with your file attached.

Share a Wordbar
- Tap
 and choose Send As.
 - In the iPad sharing popover, choose Mail or your regular email app.
- A blank email should appear with your Wordbar file attached.
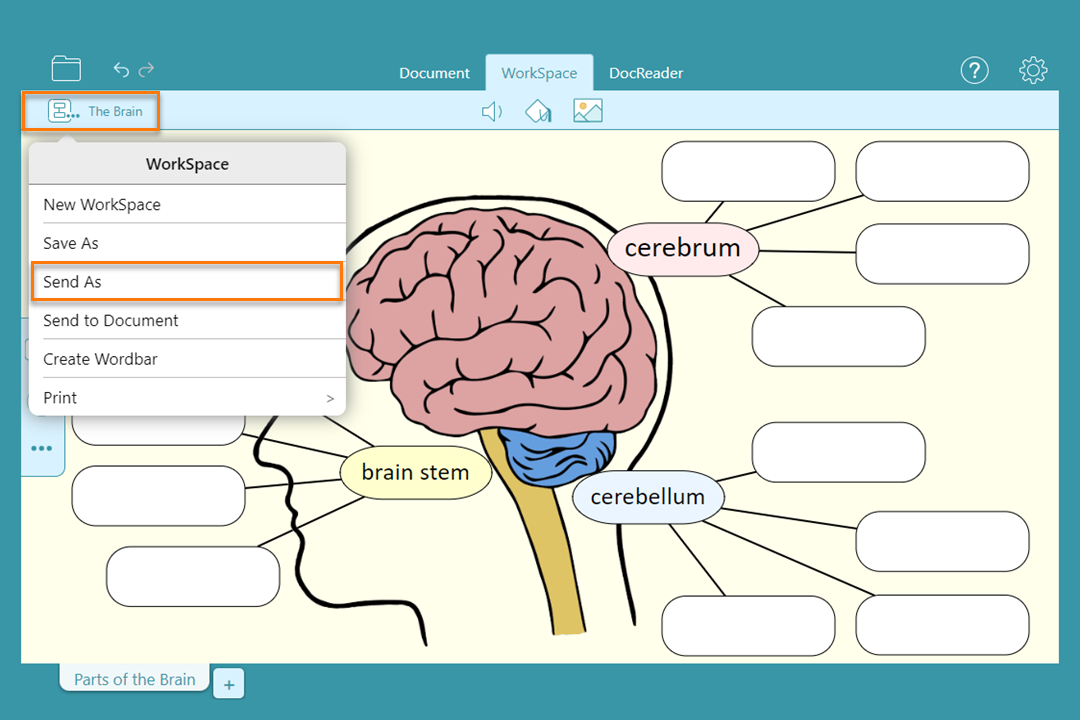
Share a WorkSpace
- Tap
 and choose Send As.
 - In the iPad sharing popover, choose Mail or your regular email app.
- A blank email should appear with the WorkSpace file attached.
Once you have cloud storage installed on your devices, saving a file using one device will automatically sync it to the others. You’ll need to install the cloud provider’s app on your iPad and link the cloud app to the Apple Files app. Ask the person responsible for IT in your organization to set this up.
- To share via cloud storage, choose the Save As option from the menu in the DocsPlus app.
- This will open the Files app. Navigate to your cloud folders using the options in the sidebar.
Share via AirDrop
You can use the AirDrop feature to wirelessly share files with another iPad or Mac. See our support article for more useful information on how to share files via AirDrop.

Share a Document
- Tap and choose Send As.
- In the iPad sharing popover, choose AirDrop and choose the device to send to.
Share a Wordbar
- Tap and choose Send As.
- In the iPad sharing popover, choose AirDrop and choose the device to send to.

Share a WorkSpace
- Tap and choose Send As.
- In the iPad sharing popover, choose AirDrop and choose the device to send to.
Top tips
Top tips
-

Introduction
-

Open a file from cloud storage
-

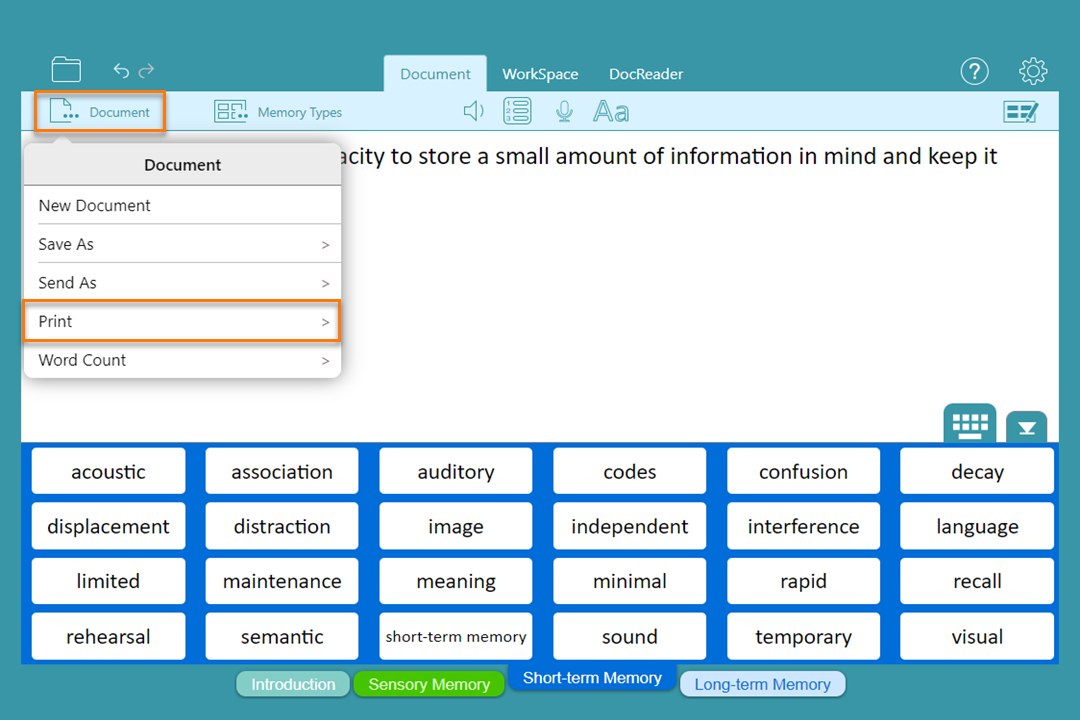
Print a Document
-

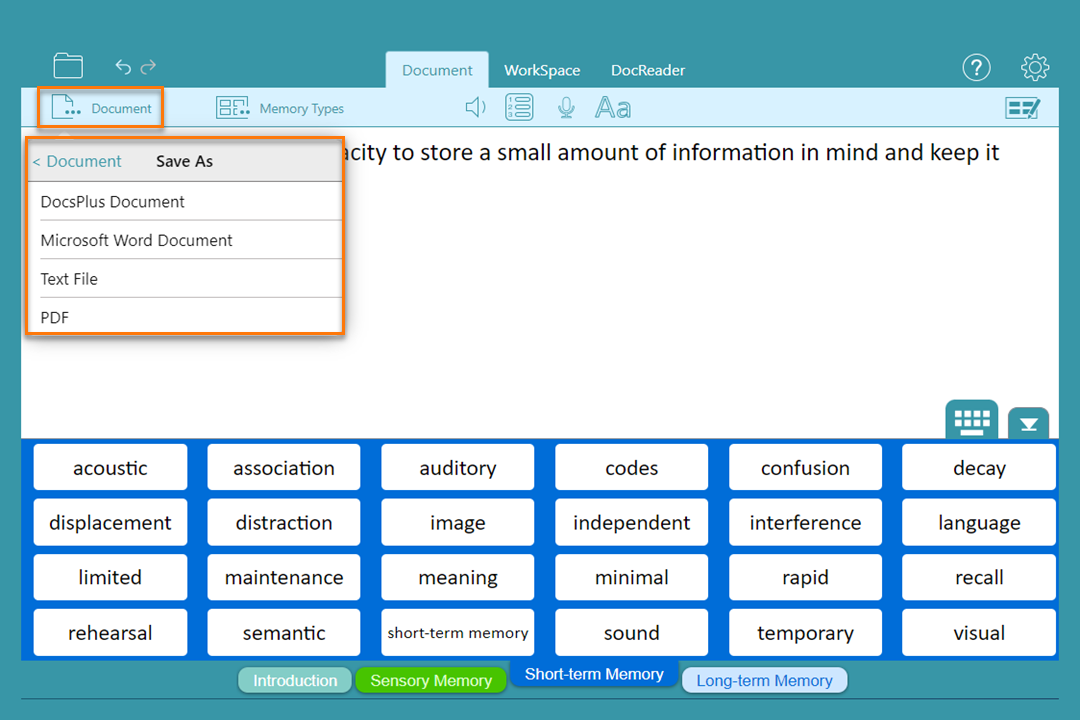
Save as type
-

Share via Google Classroom
-

Share via Microsoft Teams
-

AirDrop top tips
Open a Document or Smart Tab from Cloud Storage
Save as type
- Tap and choose Save As to save your Document in different formats:
- DocsPlus Documents can be accessed on other Chromebooks and iPads with the DocsPlus App installed and PCs with DocsPlus installed.
- Save as a DocsPlus Document to retain Voice Notes.
- Save as a Microsoft Word Document to be able to access and edit the Document on devices without DocsPlus installed.
- Save as a PDF to be able to access the Document on devices without DocsPlus installed without editing it further.
Share via Google Classroom
- To share a DocsPlus file using Google Classroom, you will need to attach it to the relevant assignment.
- Download the file before opening it in DocsPlus.
- See our support article for step-by-step instructions on how to do this.