Install Clicker Apps for Chromebook
Follow these steps to install and license the Clicker Apps:
Clicker Writer
Clicker Books
Clicker Talk
Note: everything on Chromebook happens per user instead of per device:
- When you install an app, it's just for you. If someone else signs into the same Chromebook, the app won't appear for them.
- Once installed, the app will appear automatically on any Chromebook you sign in to!
All Clicker Apps for Chromebook share a single license. If you become licensed for one Clicker App, you'll be licensed for all of them!
Choose from one of the following depending on the type of installation you wish to perform:
- Depending on the app(s) you wish to install, click on one of the links below to load the app in your Chrome browser:
Clicker Writer -
https://clickerwriter.apps.cricksoft.com
Clicker Books -
https://clickerbooks.apps.cricksoft.com
Clicker Talk -
https://clickertalk.apps.cricksoft.com
While optional, we recommend installing the app:
- Click
 in the address bar and click Install.
 - For easy access, right-click the new app icon in the bottom toolbar and choose Pin to keep it there.
The app will now appear in the launcher of any Chromebook you sign in to and can be used offline!
Whichever way you run the app, it will automatically update itself. You may see a prompt asking your permission to update – when granted, the update will happen instantly.
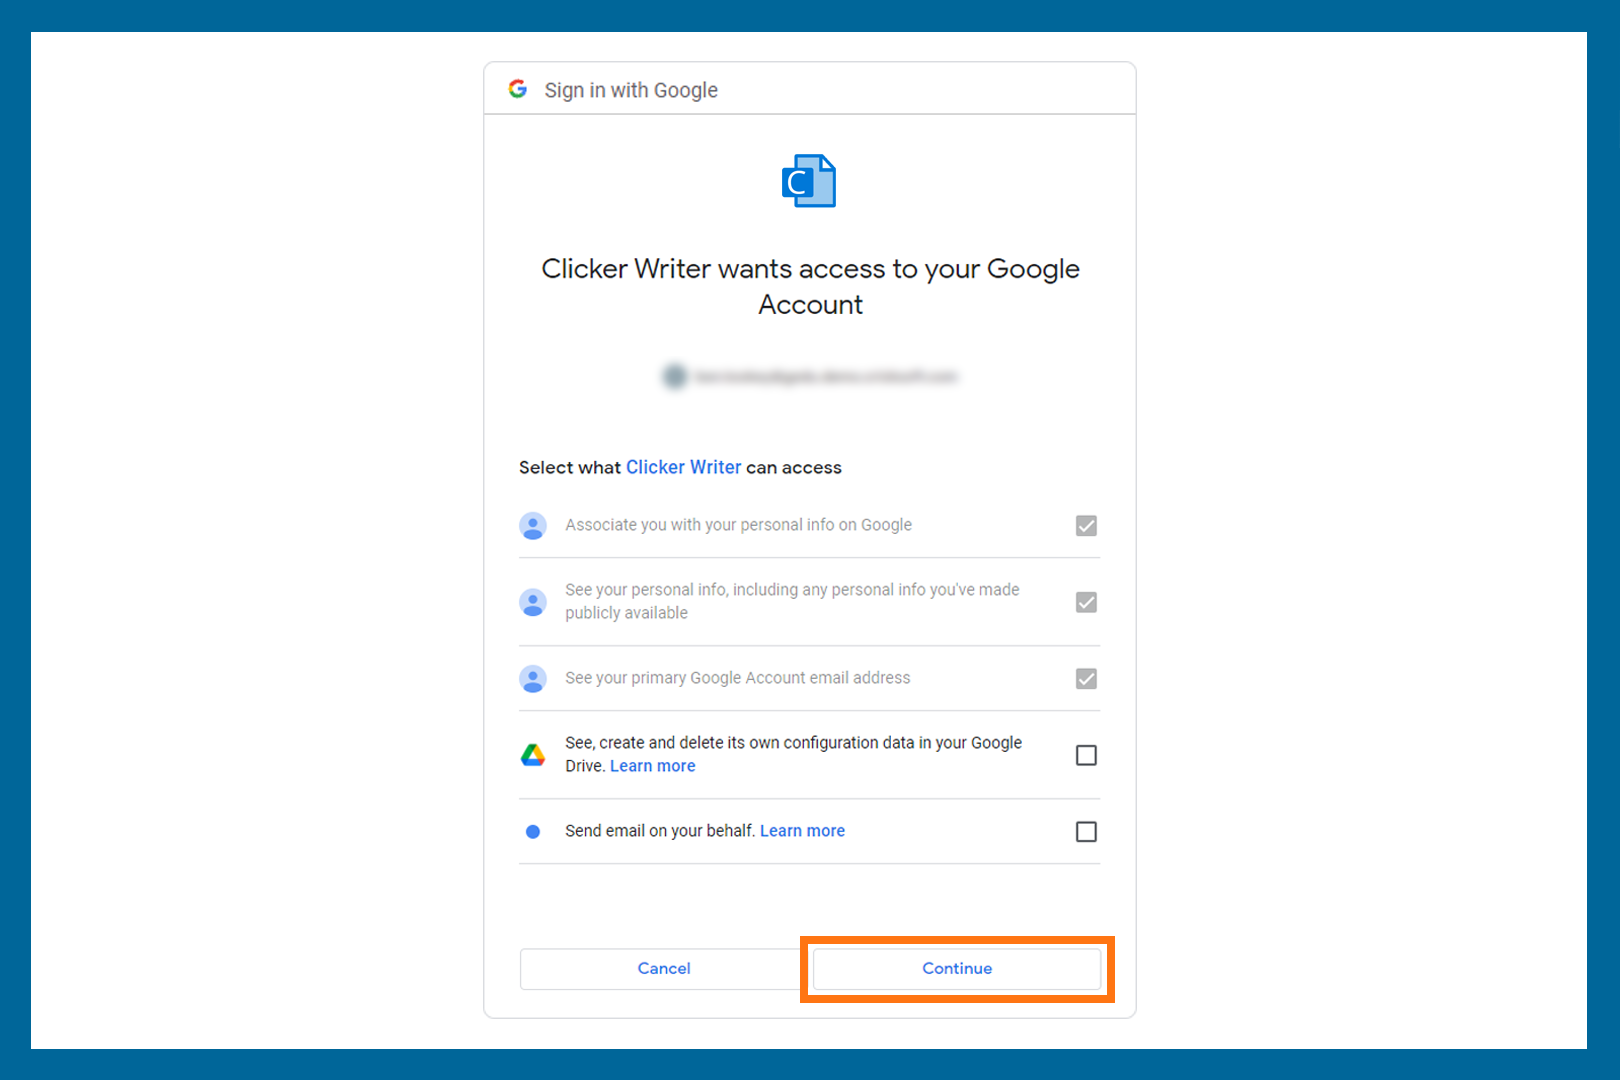
- On first use, click Sign in and select your Google account.
- Click Continue to grant the app permission to:
- see your basic account info
(for licensing purposes) - keep your settings synced via Google Drive
- send emails with files attached
(for the Send As feature)
- see your basic account info
Licensing the app to your subscription
If your Google account is already licensed, you'll see your subscription details on first use. Click Continue to start using the app. Otherwise, you can:
- Enter the Organization ID and Enrollment password you have been given on activate.cricksoft.com.
- Click Go.
- Click Continue to start using the app.
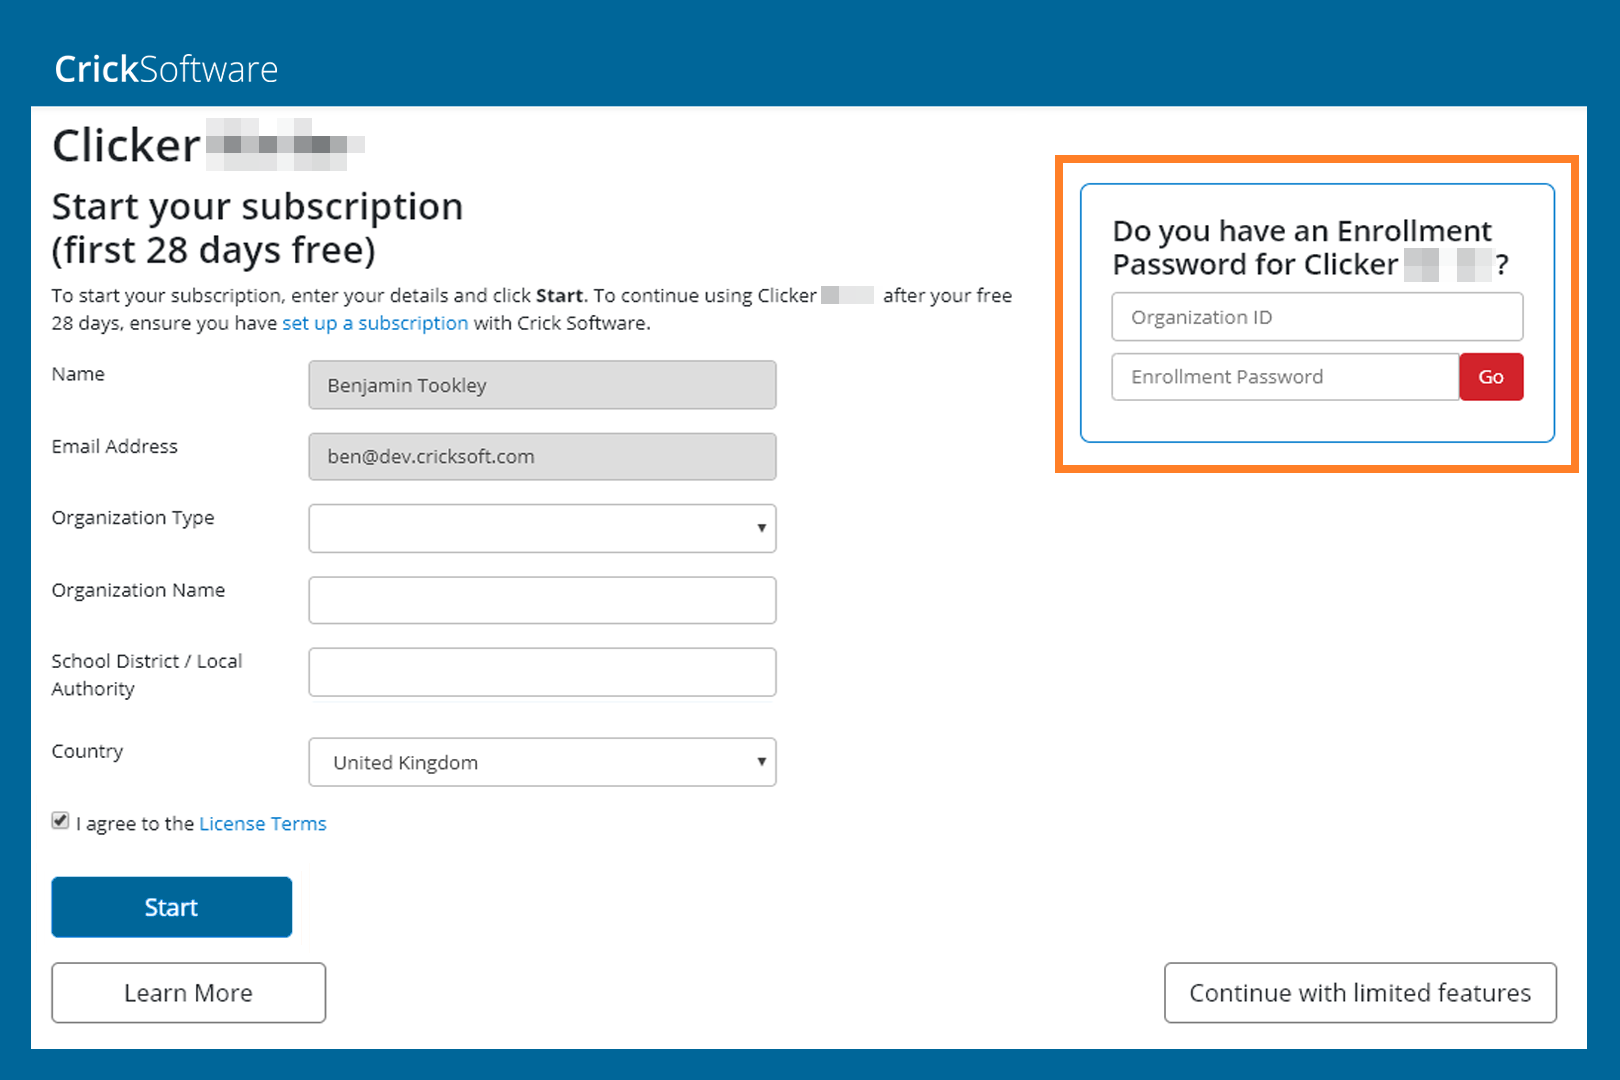
Register a trial
You can trial the app on your Chromebook by signing up for a 28-day evaluation.
- Fill out the form.
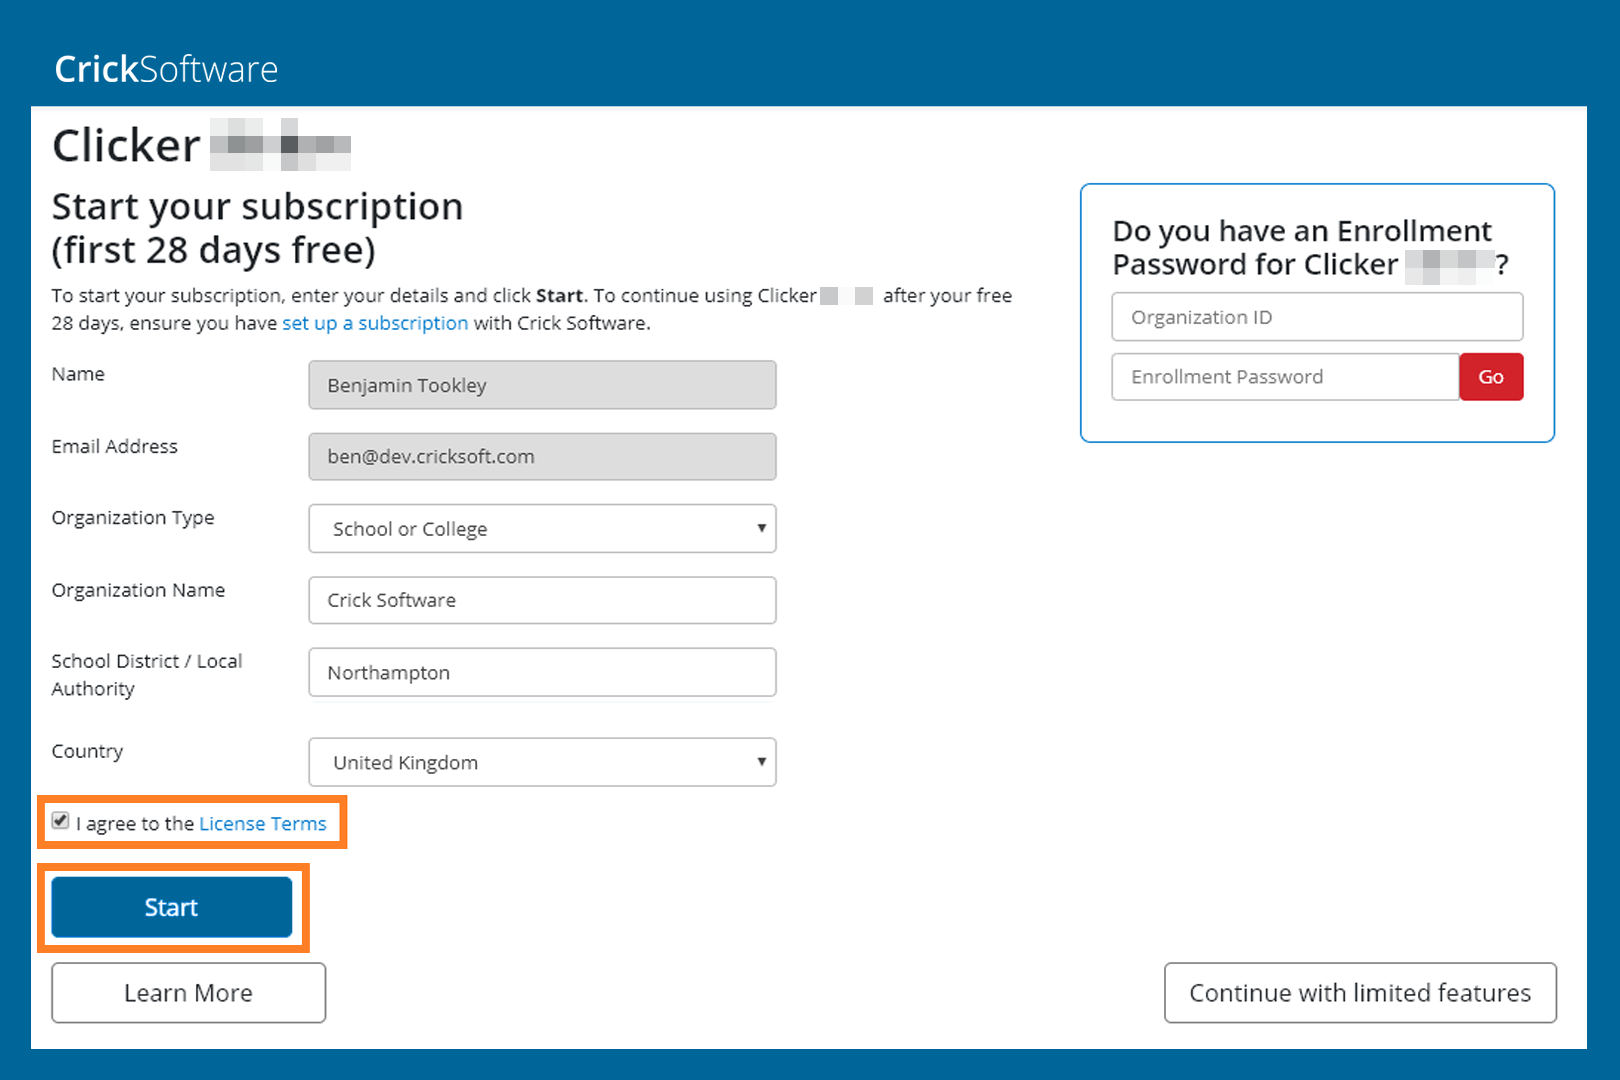
- Check the I agree to the license terms checkbox and click Start.
- Click Continue to start using the app.
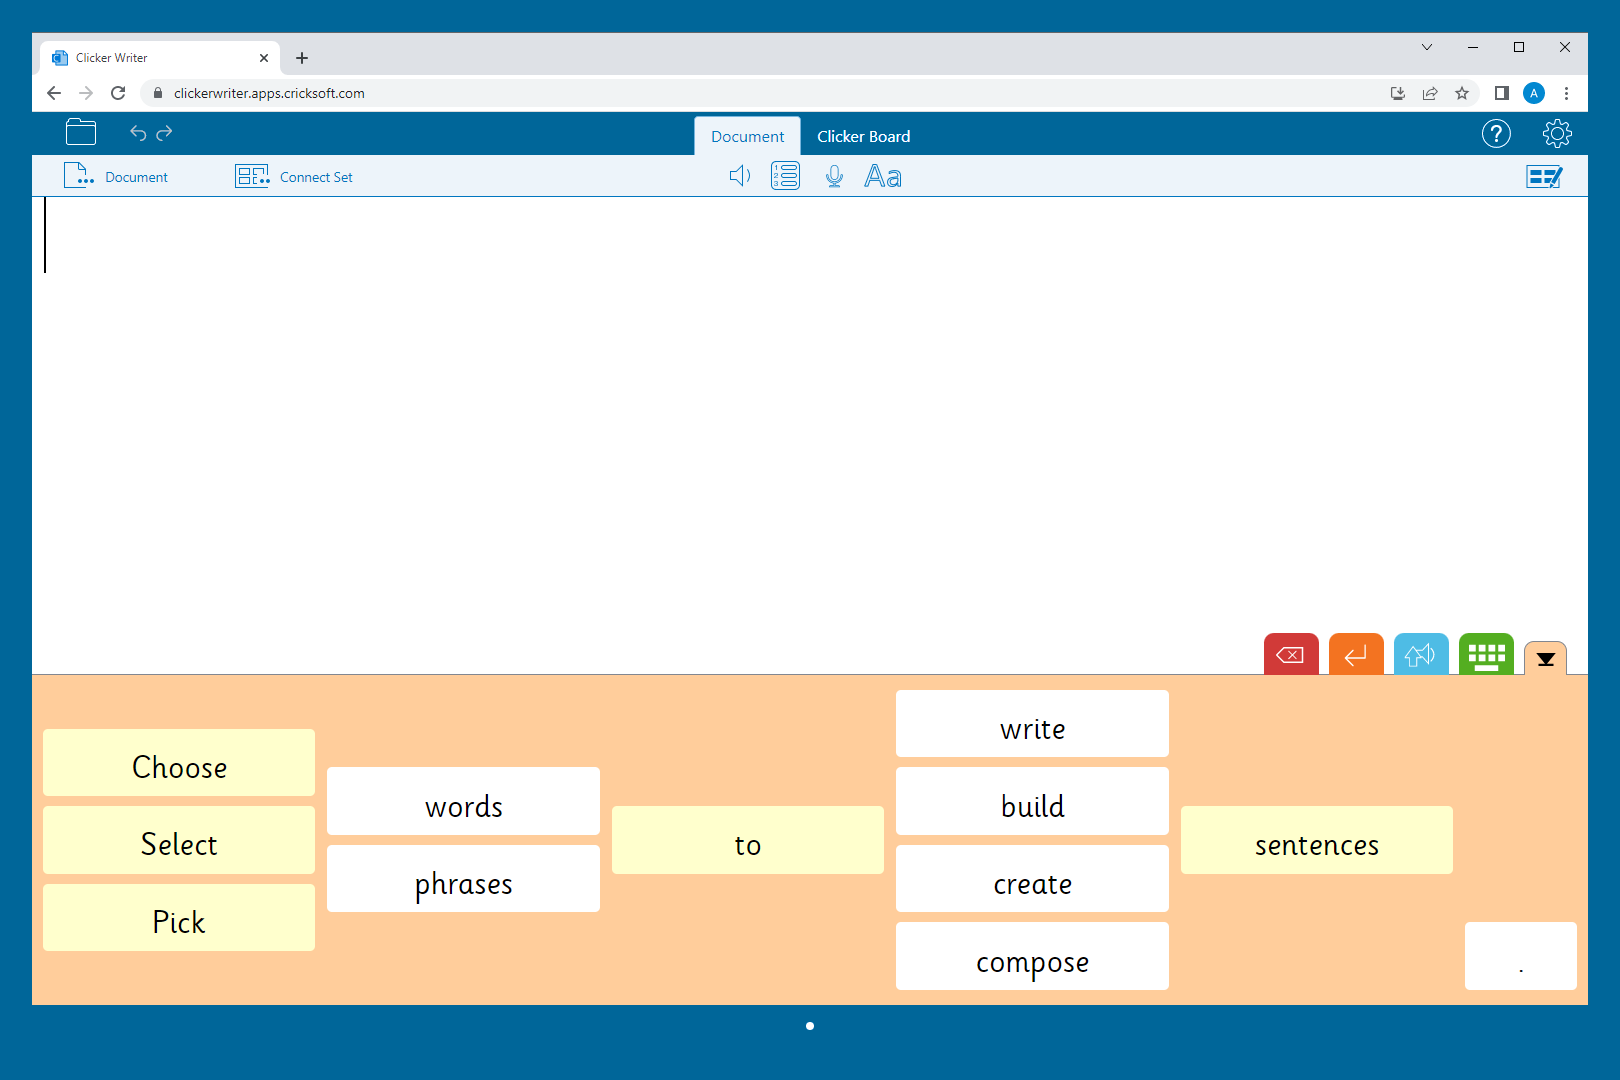
Test LearningGrids

- If the top toolbar is hidden, click the bar at the top in the center to show it.
- Click the top-left Explorer icon and choose LearningGrids.
- Click a resource's Open button.
If a message about Limited Access Mode appears, please click License and enter your subscription codes again.
Picture Library
To ensure a fast initial startup, the included picture library is stored online. To download the full library for offline use:
- If the top toolbar is hidden, click the bar at the top in the center to show it.
- Click on the settings cog in the top-right corner.
- On the Pictures tab, click Download under CrickPix2 library.
Voices
Initially, the app uses the default Google voice on your Chromebook.
To use the included children’s voices:
- If the top toolbar is hidden, click the bar at the top in the center to show it.
- Click on the settings cog in the top-right corner.
- On the Speech tab, click Download Voices.
- Pick a voice and click Download.

- Sign into the Google Admin Console (admin.google.com) as an administrator. On the left, go to Chrome > Apps & extensions > Users & browsers.
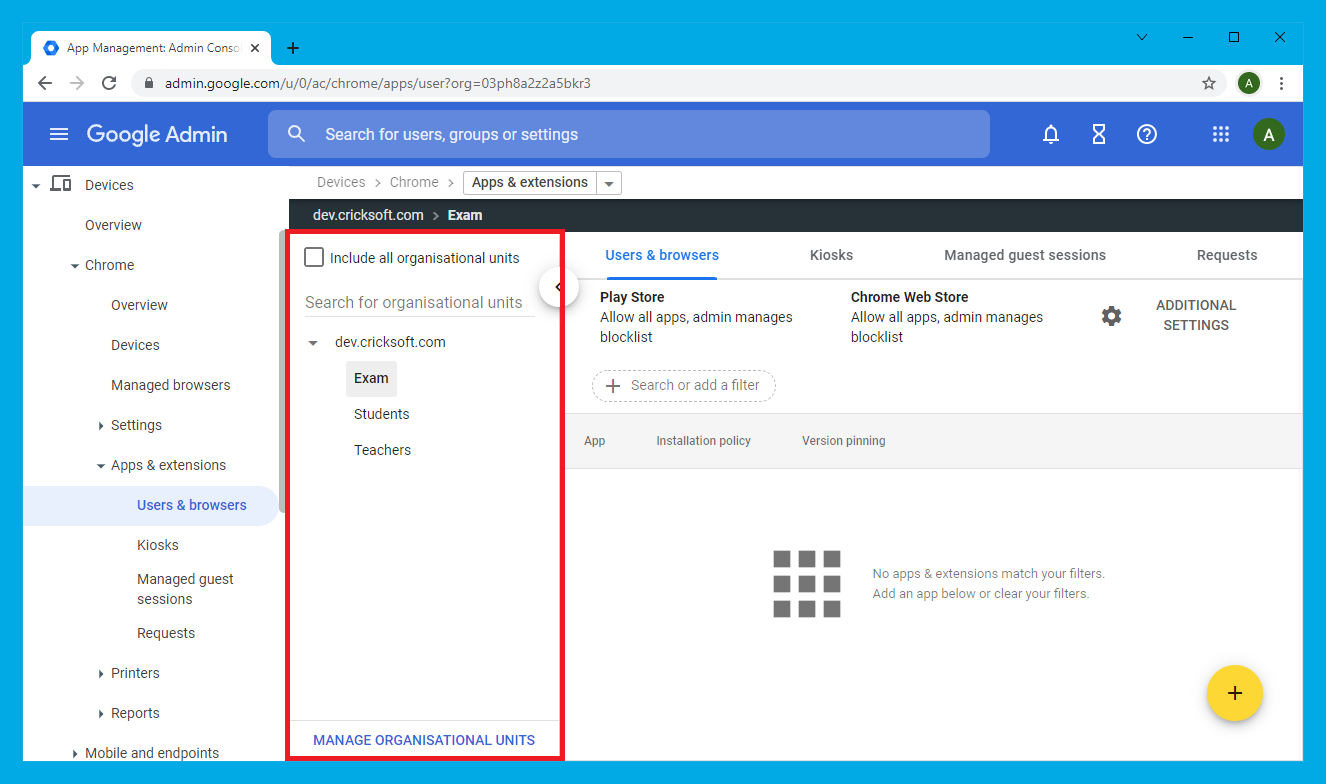
- If you have a Site License and don’t share your Google domain with other schools, select it on the left. Otherwise, select the appropriate organization unit containing the relevant users.
Note: if unlicensed users receive the app, they’ll be unable to use it.

- On the right, hover over (+) and choose Add by URL.
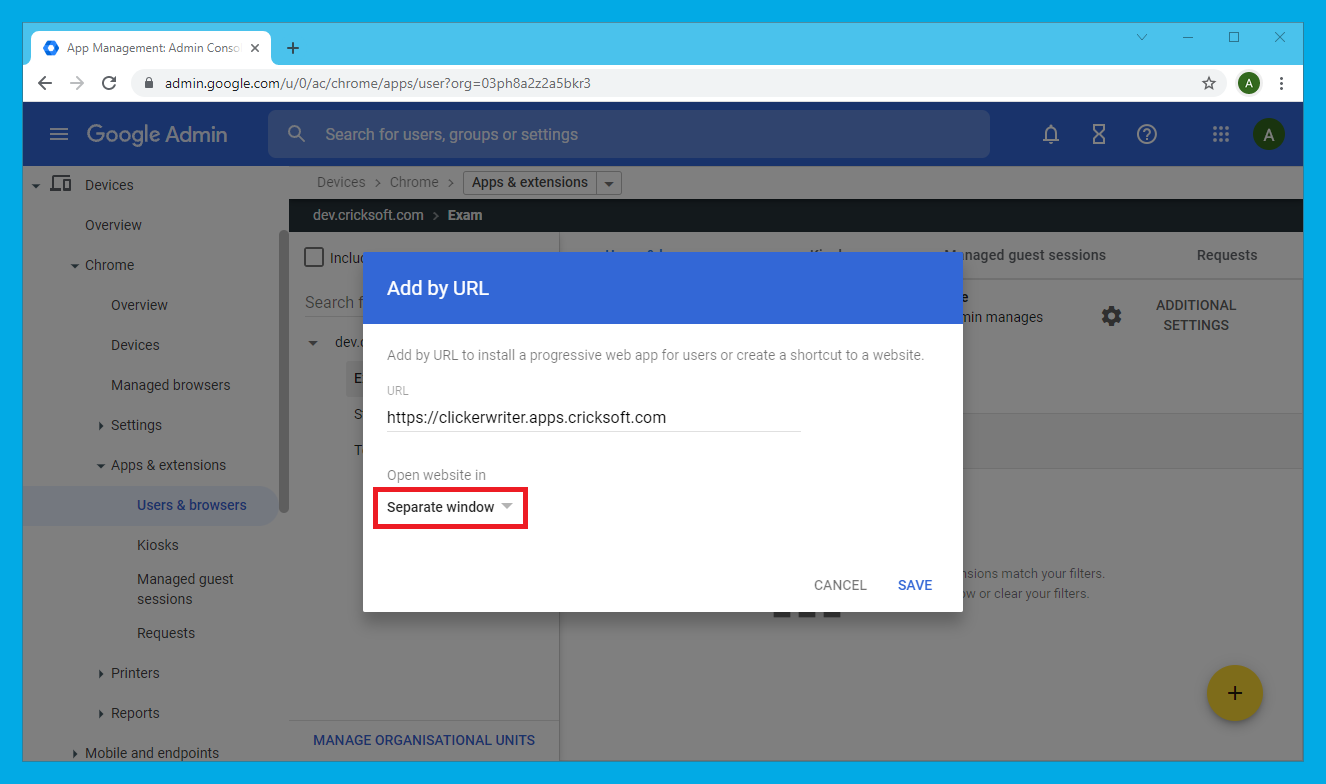
- Set Open website in to Separate Window, enter the app’s URL, and then click Save:
Clicker Writer –
https://clickerwriter.apps.cricksoft.com
Clicker Books –
https://clickerbooks.apps.cricksoft.com
Clicker Talk -
https://clickertalk.apps.cricksoft.com
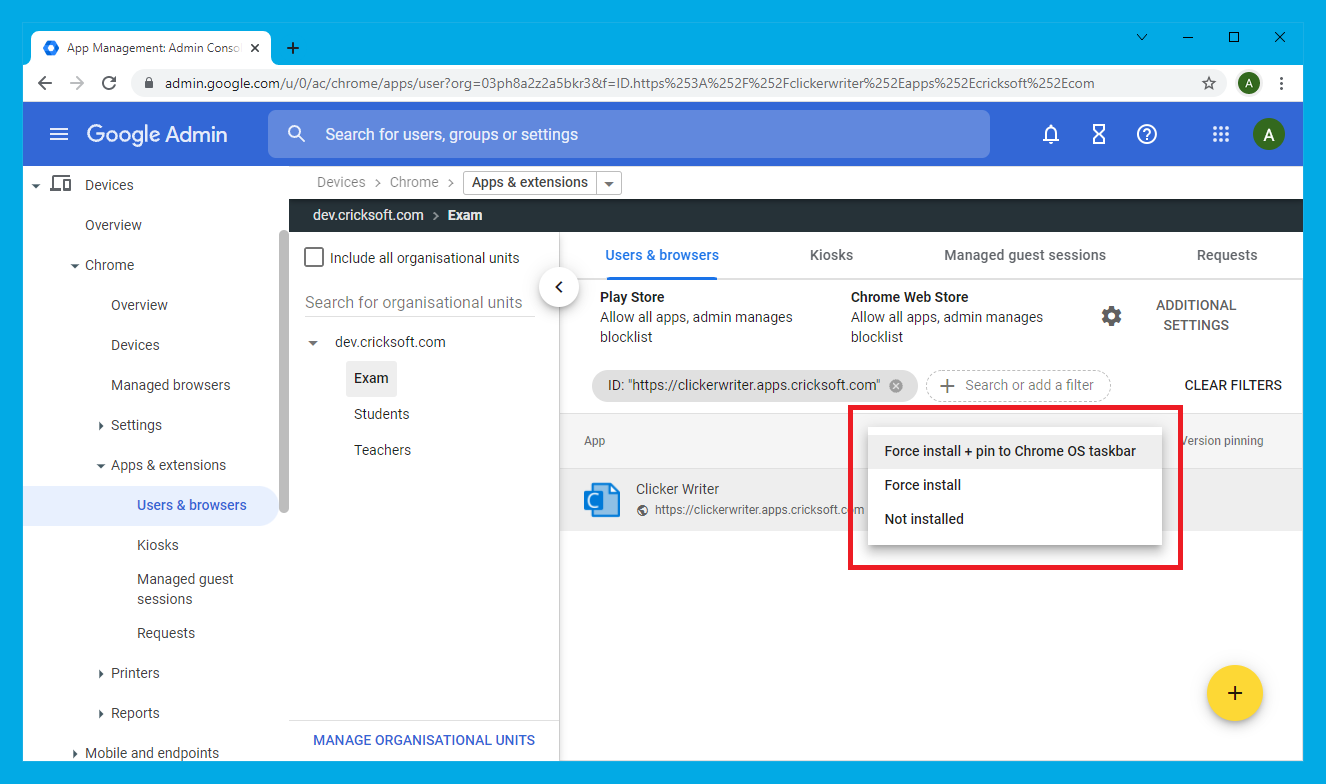
- Click the app’s Installation policy box and choose Force install + pin to Chrome OS taskbar.
License deployment
Following this guide will install the app to users’ Google profiles. It won’t automatically license them.
- If you have a Site License subscription, and don’t share your Google domain with other schools, all users should be licensed automatically (the app should launch with no messages).
If this isn’t happening, please contact Support and provide us with your Google domain. - If your subscription has a fixed number of licenses, users can be added to the subscription via our license management portal.
Alternatively, users can license themselves by launching the app and entering your Organization ID + Enrollment Password codes on launch.
To find out how you can see the status of your subscription and manage which users are licensed, please click here.
Get Support
If you don't have a subscription, you can register a trial. If someone else on your Google domain already trialed the app, you may receive an evaluation expired message.
If you experience this or any other problems, please contact Support.
Installation guide
- Title
- Installation and management guide
- Version
- Clicker Apps for Chromebook
- Last modified
- May 9, 2023
- Size
- 170 KB